


Is it Recommended to Regrout Over Pre-Existing Grout?
Are loose tiles a recurring issue in your home? Do you have broken or missing grout? If you’re searching for a definitive solution for these tile and grout challenges, you’re in the right place. This guide explores whether you can or should regrout over existing grout. We’ll delve into the advantages and drawbacks of this […]
Are loose tiles a recurring issue in your home? Do you have broken or missing grout? If you’re searching for a definitive solution for these tile and grout challenges, you’re in the right place.
This guide explores whether you can or should regrout over existing grout. We’ll delve into the advantages and drawbacks of this method to help you make an informed decision. So, whether you’re weary of tripping over those pesky loose tiles or simply aiming to refresh your space, regrouting could be the answer you’ve been waiting for.
First, let’s address the basics.
Understanding Grout
Grout is a dense fluid commonly recognized as the material that fills the gaps between your floor or wall tiles. Consisting of sand, cement, and water, the adhesive enables us to assemble stones from quarries globally into a floor or wall covering. Essentially, grout prevents water from seeping through to the floor or wall beneath the tiles.
The Pros of Regrouting
Choosing to regrout over pre-existing grout can have several benefits that enhance your tile and grout maintenance and home improvement endeavors. However, it’s equally important to be aware of the potential disadvantages.
Speed and Convenience
Regrouting is generally faster than a complete tile replacement. Equipped with the right tools and materials, you can quickly revamp your grout lines and relish the rejuvenated look of your tiles. It’s a handy solution for homeowners seeking to revive their spaces without significant disruptions.
Addressing Minor Issues
If your grout is still in relatively “good condition,” but for minor cracks or imperfections, regrouting can effectively solve these issues. Filling in these tiny gaps prevents further damage and maintains your tiles’ integrity. “Good condition” means the grout isn’t missing or showing long cracks. If so, the problem could be floor movement or flexing, which requires reinforcement before regrouting. But, if the grout is solid, regrouting can allow color changes or re-accenting.
An alternative is MARBLELIFE-COLORSEAL, which will enable you to recolor the existing grout, enhancing stain resistance and improving resistance to acid cleaners, summing up your work in minor tile and grout repair.
No Need for Tile Removal
A significant advantage of regrouting is that it eliminates the need for grout removal. Consequently, you save time, effort, and potential damage to your tiles during removal. However, sufficient depth must be needed for the new grout to adhere effectively. If the existing grout is level with the tile surface or insufficiently recessed, you may find limited space for the new grout. MARBLELIFE COLORSEAL is a less dusty, faster process in such scenarios, requiring less space while providing a long-term solution.
Cost-Effective Solution
Compared to complete tile replacement, regrouting is a more budget-friendly tile and grout restoration option. It’s typically faster and less expensive, ideal for budget-conscious homeowners looking to refresh their surfaces without major renovation.
When dealing with natural materials like marble or limestone, professional grout repair and grout maintenance services, such as those offered by MARBLELIFE, can restore damaged tiles while preserving the floor’s original color integrity.
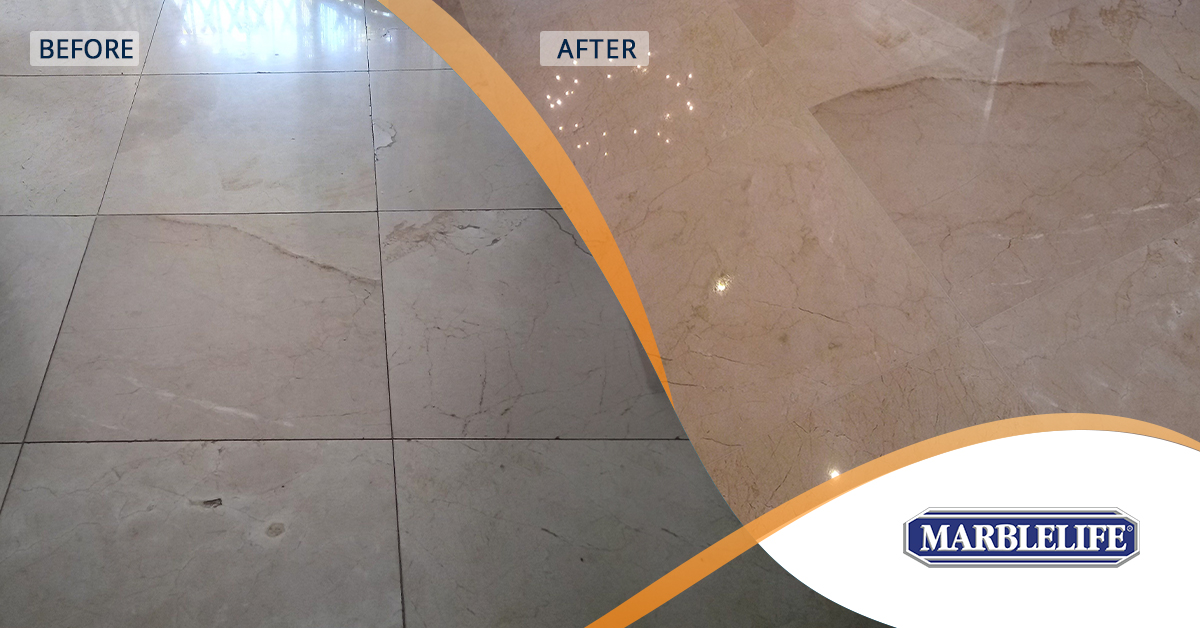
Enhanced Appearance
Grout can become discolored or stained over time, detracting from your tiles’ aesthetic appeal. By regrouting, you can restore a fresh and revitalized look to your tiles, creating a cleaner and welcoming ambiance. It’s important to note, however, that grout staining results from failing to seal the grout or the failure of the grout seal.
A solution like MARBLELIFE COLORSEAL is acid-resistant and can be colorized, offering a superior long-term solution.
The Cons of Regrouting
Durability Concerns
Regrouting over pre-existing grout may not be as durable as new grout applied directly to the tiles. In the long run, the new grout may wear out faster, requiring more frequent maintenance or eventual regrouting. The thinner the grout, the more brittle and susceptible to breakage it becomes. Here, MARBLELIFE COLORSEAL provides a better solution as it bonds better with the old grout and can retain a lower-than-tile height where it avoids contact with foot traffic.
Water Resistance Issues
New grout may not be as watertight as grout applied directly to bare tiles, which can lead to water seepage. This is a key concern in high-moisture areas like bathrooms and kitchens.
If you choose to regrout, proper grout maintenance is essential. Be sure to reseal the new grout to protect against moisture and maintain a cleanable surface, especially after tile and grout cleaning or minor grout repair.
Adhesion Challenges
New grout may not adhere well to old grout, unlike fresh grout applied directly to bare tiles, which can affect the long-term durability of the regrouted surface. Scoring the existing grout can help improve adhesion by creating texture for mechanical bonding.
MARBLELIFE COLORSEAL remains a more effective option if discoloration or grout staining is the main concern. However, if your goal is to correct grout depression or achieve a flat, even floor surface, scoring the grout becomes necessary.
Weigh these considerations carefully before regrouting. Whether you choose traditional grout repair or a modern solution like COLORSEAL, the priority is maintaining a clean, strong, and visually appealing tiled surface through proper tile and grout restoration.
When Should You Regrout?
Choosing the right time to regrout your tiles can hinge on many factors. The appearance of cracked or discolored grout, loose tiles, or signs of mold and mildew stains indicates that you may need to consider regrouting. Always be sure to assess the condition of your tiles and seek professional advice if you’re uncertain about the best course of action.
The main reasons for regrouting can include the following:
Grout Staining
If the issue is stained grout, you might be at the start of a repetitive cycle unless you take specific measures. To avoid the same situation, it would be best to consider sealing the surface after regrouting.
Another option could be using a treatment such as MARBLELIFE COLORSEAL, which can protect your new surface. Alternatively, replace the existing grout with a non-porous variant like epoxy. However, in this case, you’d need to remove most of the existing tile and grout to ensure the epoxy is deep enough to prevent brittleness from a thin overcoat.
Mold Prevention
Regrouting can help elevate the grout surface to prevent water from pooling, which often leads to mold and mildew in high-moisture areas like bathrooms and kitchens. This simple form of grout repair improves drainage, supports better grout maintenance, and helps preserve a cleaner, healthier surface.
Grout or Tile Repairs
If you have cracked grout or loose tiles, it’s advisable not to proceed with regrouting or tile and grout repair until the movement that caused the cracking has been addressed.
Poor Grout Installation
If your grout is cracking because it was too dry when installed due to improper mixing or being allowed to dry out, then the old grout needs to be removed.
If not, you would be grouting over a weak substrate, as the dry grout would behave like pact dirt rather than a uniform reacted mass.
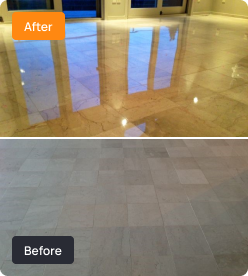
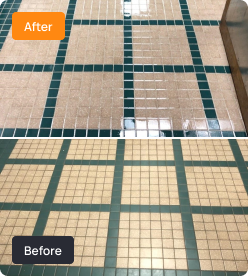
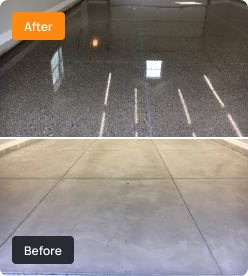
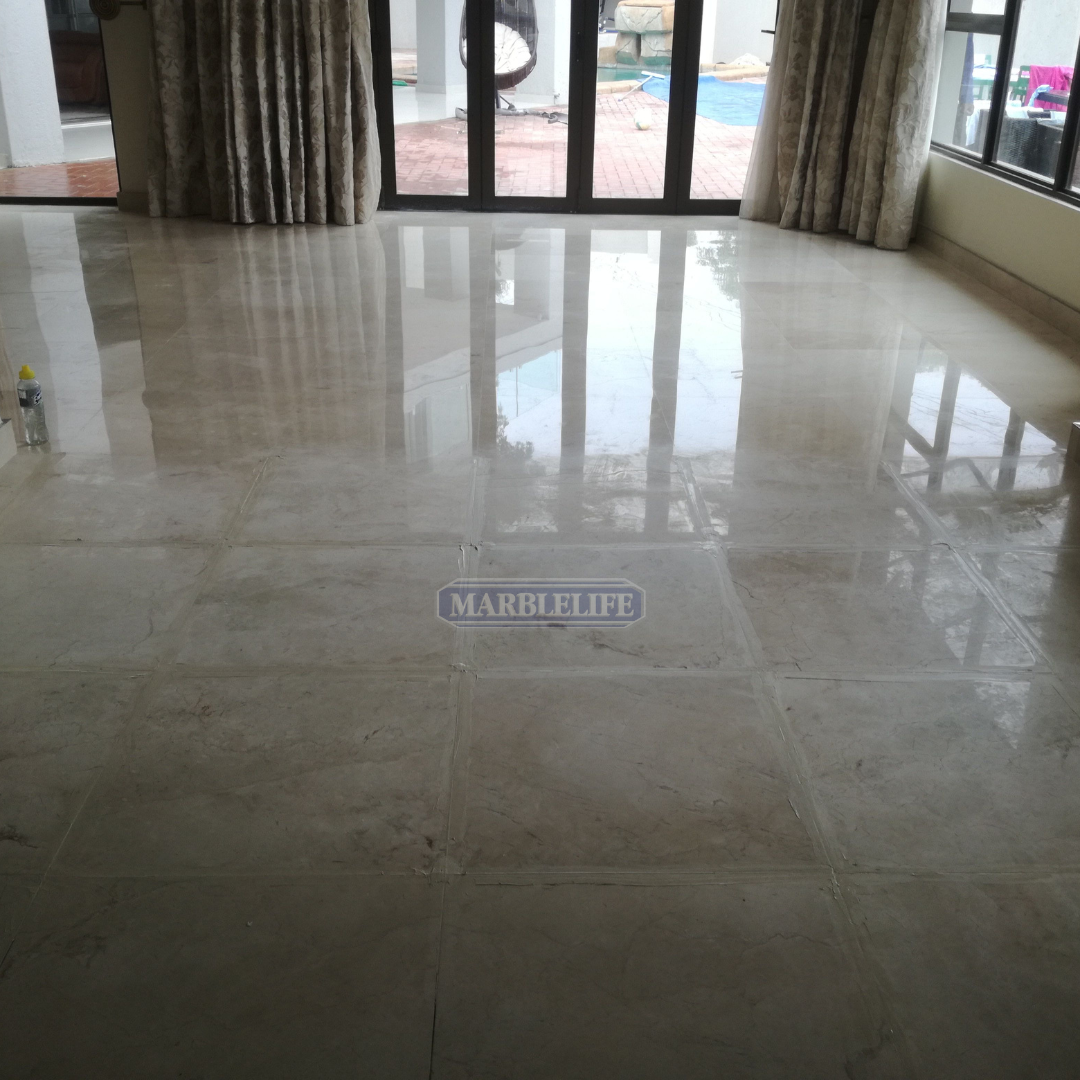
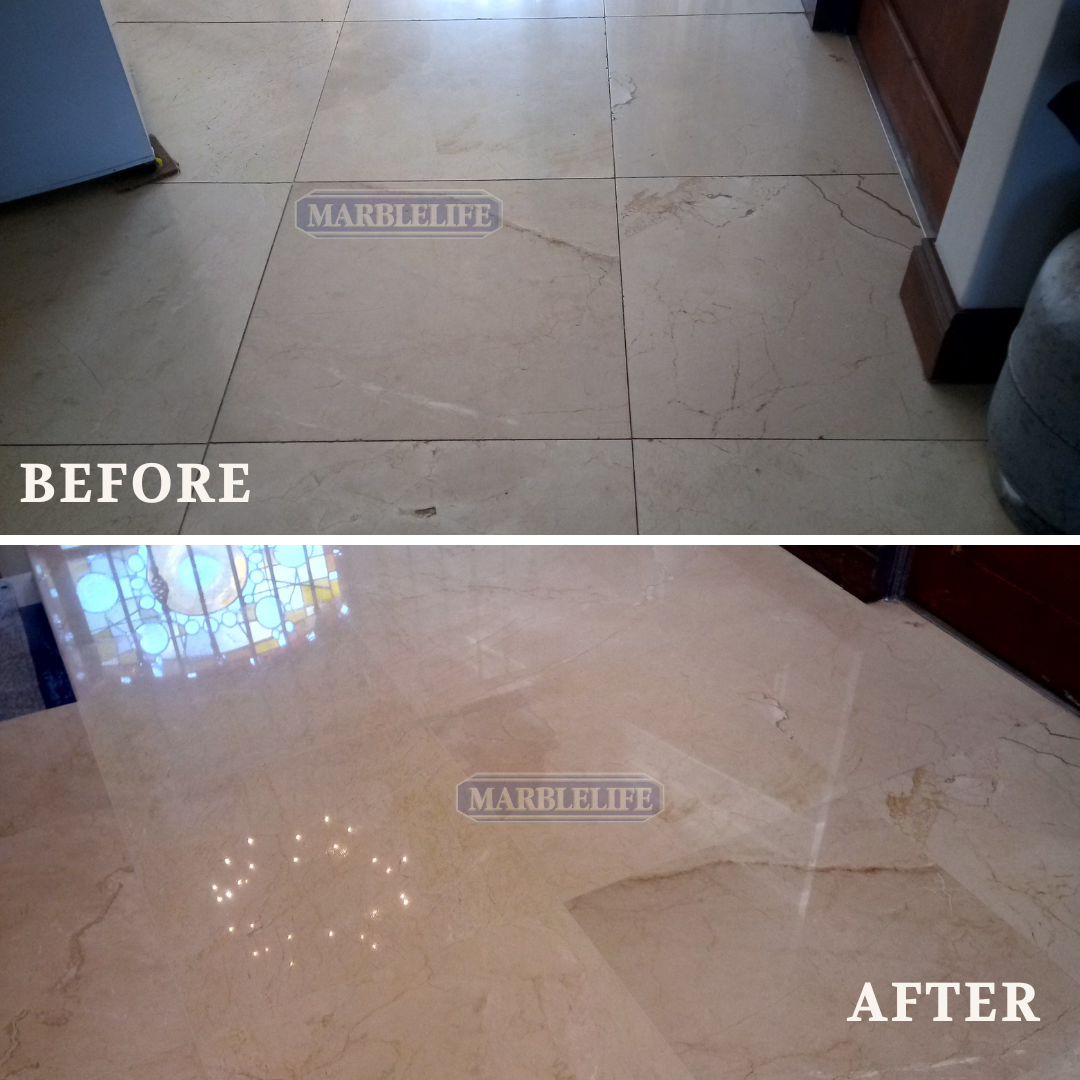
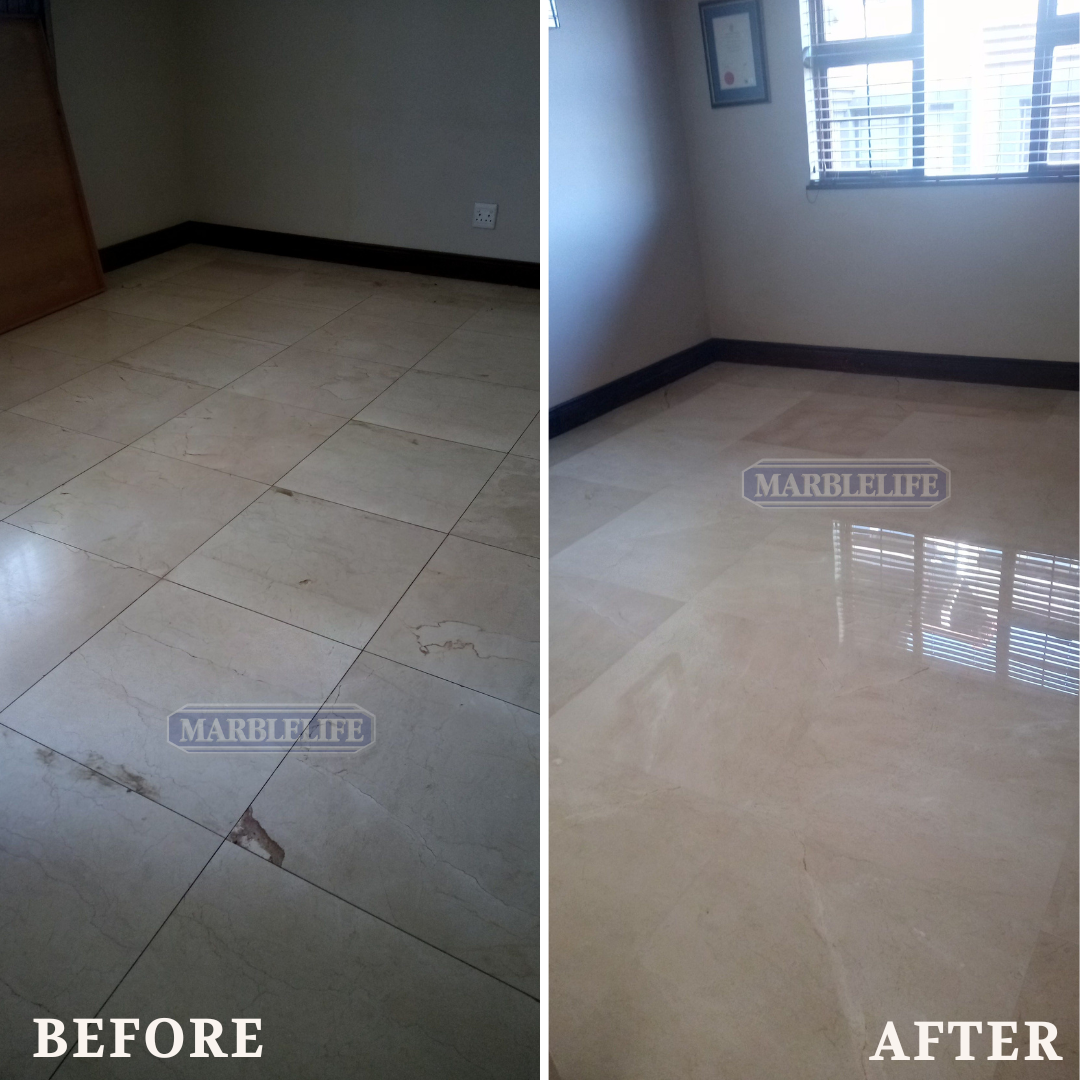
Creating a Flat Floor
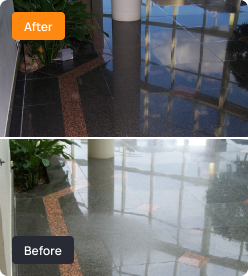
Unlike the traditional uneven surface of a tile-and-grout floor, you may wish to create a flat floor for easier cleaning and a more refined appearance. This level finish is generally achievable only with homogeneous tiles such as marble, granite, travertine, limestone, slate, and select engineered materials like concrete or terrazzo.
This tile and grout restoration technique is not suitable for glazed surfaces like ceramic, porcelain, or terracotta, as grinding through the glaze causes visual inconsistencies. When done correctly, flattening a natural stone floor not only improves aesthetics but also simplifies grout maintenance and reduces the need for frequent grout repair, making the floor easier to clean and more durable over time.
Notice the ‘BEFORE’ in the foreground, where the regrouting has already been applied, and the ‘AFTER FLATTENING’ in the back of the image, where you can see the transition from a tile-and-grout floor to a single-planar floor with a consistent pattern.
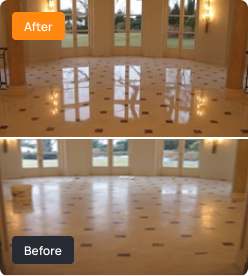
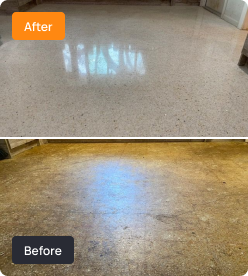
For example, the MARBLELIFE ULTIMATE FLAT FLOORS offer palace-quality reflectivity that is elegant and labor-intensive. It requires a master craftsman to deliver this level of elegance. When creating a MARBLELIFE ULTIMATE FLAT FLOOR, the grout’s tendency to shrink upon curing is accounted for. The grout is applied wet but loses water, volume, and mass as it dries, leading to a cupped surface in a normal installation.
However, when crafting a MARBLELIFE ULTIMATE FLAT FLOOR, the grout line is over-grouted, left to cure, and at ground level with the floor. The entire floor is then polished to high reflectivity, leading to a perfectly smooth, easy-to-clean surface with no low spots to catch dirt. This type of flooring is not just beautiful, but it’s also easier to clean with a dust mop that can glide effortlessly across the floor. Over 50% of the marble floors restored by MARBLELIFE are upgraded to a MARBLELIFE ULTIMATE Flat Floor in South Africa.
Regrouting Over Pre-Existing Grout: Guidelines and Tips
Regrouting over pre-existing grout can be an attractive option due to its convenience and cost-effectiveness compared to completely replacing existing grout. However, several important factors should be considered. Here is a step-by-step process that addresses those considerations:
Step 1: Assess the Condition
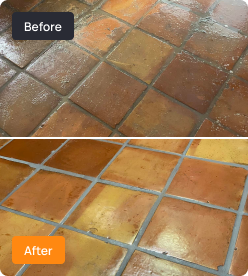
Before you decide to regrout, evaluate the state of the existing tile and grout. If it’s severely damaged, crumbling, or has mold, it may be necessary to remove it entirely. However, regrouting can be effective if the grout is in decent condition, apart from minor cracks or discoloration.
Step 2: Prepare the Grout Lines
Start by tile and grout cleaning with an appropriate cleaner like MARBLELIFE MAXOUT GROUT DEEP CLEANER, designed to penetrate open grout pores and help loosen and lift dirt. For stubborn grime, you may need to use a nylon-bristle brush. Avoid metal or steel brushes, which can introduce metal fragments that may later rust and stain the grout line red.
Step 3: Remove Loose Grout
Inspect the grout lines for any loose or crumbling grout, and use a grout saw to remove this soft material. Avoid using a chisel as it could chip the tile. Be careful not to scratch the tile surface, which would then require re-polishing. The goal is to create a solid, stable surface for the new grout to adhere to. If grout is flush with the tile, it might need to be cut back to create the depth required.
Step 4: Apply Grout Sealer
If the old grout repels water when wet, you may need to remove the seal to ensure good contact between the new and old grout. This process depends on the sealer used. Use a penetrating sealer as a bonding agent for an acid-sensitive surface just before installing the new grout. Follow the manufacturer’s instructions for the correct application and drying time.
Step 5: Mix and Apply New Grout
Mix the new grout according to the manufacturer’s instructions and apply it over the existing grout lines using a grout float. Work in small sections to prevent the grout from drying out before you can finish.
Step 6: Clean Excess Grout
Use a damp sponge or cloth to remove excess grout from the tile surfaces. Rinse the sponge frequently to prevent the grout from smearing over the tiles.
Step 7: Allow Grout to Cure
Adhere to the manufacturer’s instructions for drying and curing time, and avoid foot traffic or water exposure during this period.
Conclusion
The reasons for considering regrouting can vary, but once you have determined it to be the best approach, you can achieve a quality appearance. Examine your tile and grout and evaluate whether regrouting is the most practical solution. In some cases, complete removal may be necessary if they are beyond restoration.
Professional Assistance with MARBLELIFE
If you need professional guidance for tile and grout cleaning, consider MARBLELIFE. As a care product manufacturer and service provider, MARBLELIFE is well-equipped to help you find the right solution for your grouting needs. From helping you determine the root cause of your grout condition to suggesting the most suitable tile and grout repair options, MARBLELIFE can be a valuable resource.
Whether you need advice, appropriate cleaners and sealers, or a specific service, MARBLELIFE has a wide range of products and services for your grouting needs. If you’d rather have someone else provide the service, consider options like MARBLELIFE COLORSEAL, which is often faster, dust-free, and allows changing grout colors.
MARBLELIFE can help restore their natural elegance or enhance it with an ultimate flat floor palace quality finish for natural surfaces. While regrouting does have its place, in most cases today, it can be avoided thanks to alternative solutions.